Using Page scroll to id with SiteOrigin Page Builder
A quick guide for using “Page scroll to id” WordPress plugin with SiteOrigin Page Builder and Widgets Bundle on your WordPress site.
In WordPress admin, go to Settings → Page scroll to id. Change the Selector(s) option value to:
a[href*=#]:not([href=#])

and hit Save Changes.
By changing the element selector above, we instruct the plugin to handle all links that have a hash (#) in their URL.
SiteOrigin Page Builder plugin allows us to enter an id value for each row/widget we want (via the Row ID and Widget ID fields). This is very handy as a)we don’t need to create our id targets manually and b)makes links highlighting easier and more precise.
In your post/page SiteOrigin editor, edit the row you want (via the wrench icon above the row) to add a target id

Click Attributes on the right sidebar and enter the id value you want (e.g. section-1) in the Row ID field
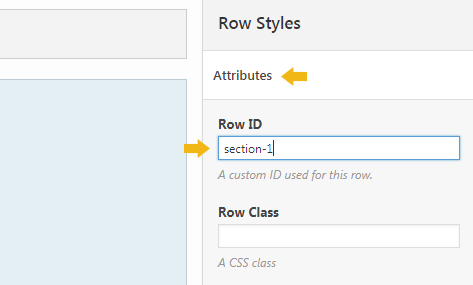
Click Done to save and close it.
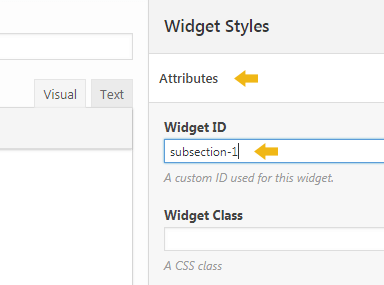
You can do the same with widgets. In SiteOrigin editor, edit the widget you want to add a target id. Click Attributes on the right sidebar and enter the id value you want in the Widget ID field

When ready, click Update (or Publish) to save your post.
Now, any link you create with URL #section-1 (or any id value you entered in the Row ID or Widget ID field previously) will scroll smoothly to that target. You can create standard/plain links in the post editor, custom links in your menu, links via “Page scroll to id” shortcode etc. All kind of links will work as long as they point to an existing target id in your page(s).
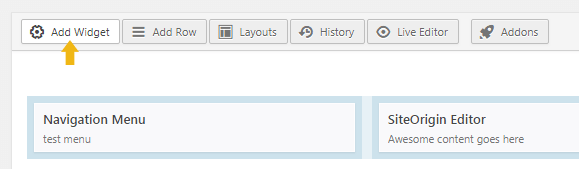
Another way of adding targets to SiteOrigin editor, is using the “Page scroll to id target” widget.
Click Add Widget and select “Page scroll to id target”
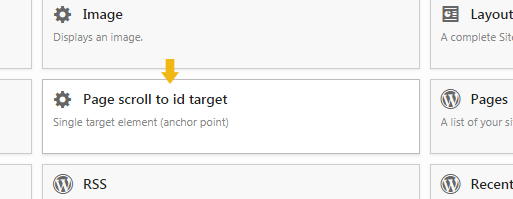
Edit the newly added “Page scroll to id target” widget and insert the id value you want.
In addition to all the methods above, you can always use plugin’s shortcodes directly in SiteOrigin editor/content widget.
Thanks for writing this tutorial 🙂