jQuery thumbnail scroller
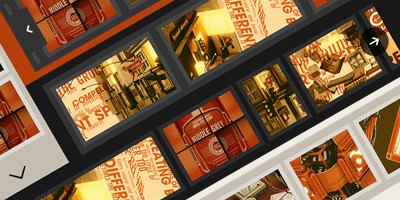
A thumbnail/image scroller that can be used as standalone or alongside lightboxes, gallery scripts etc. Features include: scrolling by cursor movement, buttons and/or touch, vertical and/or horizontal scrolling, customization via CSS and option parameters, methods for triggering events like scroll-to, update, destroy etc., user-defined callbacks functions and more.
Current version 2.0.3 (Changelog) – Version 1.x.x (no longer actively maintained)
How to use it
HTML
Get plugin files. Extract and upload jquery.mThumbnailScroller.min.js and jquery.mThumbnailScroller.css to your web server (more info)
Include jquery.mThumbnailScroller.css in the head tag your html document
<link rel="stylesheet" href="/path/to/jquery.mThumbnailScroller.css">
Include jQuery library (if your project doesn’t use it already) and jquery.mThumbnailScroller.min.js in your document’s head or body tag
<script src="http://ajax.googleapis.com/ajax/libs/jquery/1.11.1/jquery.min.js"></script>
<script src="/path/to/jquery.mThumbnailScroller.min.js"></script>
Create the markup with your images, links, etc. which is basically an element (e.g. a div) holding an unordered list (ul)
<div id="my-thumbs-list">
  <ul>
    <li><a href="image-1-link"><img src="/path/to/image-1-file" /></a></li>
    <li><a href="image-2-link"><img src="/path/to/image-2-file" /></a></li>
    <li><a href="image-3-link"><img src="/path/to/image-3-file" /></a></li>
    <li><a href="image-4-link"><img src="/path/to/image-4-file" /></a></li>
    <!-- and so on... -->
  </ul>
</div>
CSS
Give your element (in the example above #my-thumbs-list) a width and/or height value and a CSS overflow value of auto or hidden. For example:
#my-thumbs-list{
  overflow: auto;
  width: 800px;
  height: auto;
}
If you’re creating a vertical scroller, you’ll need to set a height (or max-height) value
#my-thumbs-list{
  overflow: auto;
  width: 300px;
  height: 500px;
}
Initialization
Initialize via javascript
Create a script and call mThumbnailScroller function on your element selector along with the option parameters you want
<script>
    (function($){
        $(window).load(function(){
            $("#my-thumbs-list").mThumbnailScroller({
              axis:"x" //change to "y" for vertical scroller
            });
        });
    })(jQuery);
</script>
Initialize via HTML
If you prefer to initialize the plugin without a script, you can simply give your element the class mThumbnailScroller and optionally set its orientation via the HTML data attribute data-mts-axis ("x" for horizontal and "y" for vertical). For example:
<div id="my-thumbs-list" class="mThumbnailScroller" data-mts-axis="x">
  <ul>
    <!-- your content -->
  </ul>
</div>
Basic configuration & option parameters
The 2 basic options are axis which defines the scroller orientation and type which defines how the user interacts with the scroller.
axis
The default scroller orientation is horizontal, so if you don’t set an axis option value, it defaults to "x"
$("#my-thumbs-list").mThumbnailScroller({ axis:"x" });
To create a vertical scroller, set axis option to "y"
$("#my-thumbs-list").mThumbnailScroller({ axis:"y" });
or use data-mts-axis="y" if you’re initializing the plugin via HTML
type
You can set the type of scroller via javascript, for example:
$("#my-thumbs-list").mThumbnailScroller({ type:"hover-50" });
or using the HTML data attribute data-mts-type, e.g.:
<div class="mThumbnailScroller" data-mts-type="hover-50">...</div>
There are 4 basic scroller types:
"hover-[number]"(e.g."hover-33","hover-80"etc.)Scrolling content in linear mode by hovering the cursor over the scroller edges. The edges are defined by the type name, where [number] indicates the percentage of the scroller area in which scrolling is idle. For example, setting
"hover-50"(default value) on a 600 pixels wide horizontal scroller, means that scrolling will be triggered only when the cursor is over the first 150 pixels from the left or right edge. And when cursor is over the 50% of the scroller width (300 pixels), scrolling will be idle or stopped.hover-preciseScrolling content with animation easing (non-linear mode) by hovering the cursor over the scroller. The scrolling speed and direction is directly affected by the cursor movement and position within the scroller.
"click-[number]"(e.g."click-50","click-90"etc.)Scrolling content by clicking buttons. The scrolling amount is defined by type name, where [number] indicates a percentage of the scroller area. For example, setting
"click-50"on a 800 pixels wide horizontal scroller, means that each time you click the left or right arrow buttons, the content will scroll by 400 pixels (50% of 800px) to the left or right.click-thumbScrolling each image/thumbnail at a time by clicking buttons.
"hover-[number]" and hover-precise types become disabled on touch-enabled devices and replaced by content touch-swipe scrolling.
Configuration
You can configure your scroller(s) using the following option parameters when calling mThumbnailScroller function
Usage $(selector).mThumbnailScroller({ option: value });
setWidth: false
- Set the width of the scroller (overwrites CSS width), value in pixels (integer) or percentage (string).
setHeight: false
- Set the height of the scroller (overwrites CSS height), value in pixels (integer) or percentage (string).
setTop: 0
- Set the initial css top property of content, accepts string values (css top position).
Example:setTop: "-100px".
setLeft: 0
- Set the initial css left property of content, accepts string values (css left position).
Example:setLeft: "-100px".
type: "string"
- Scroller type defines the way users interact with the scroller.
Available values:"hover-[number]"(e.g."hover-50")
Scrolling content in linear mode by hovering the cursor over the scroller edges. The edges are defined by the type name, where [number] indicates the percentage of the scroller area in which scrolling is idle. Scrolling accelerates proportionally according to cursor position: e.g. scrolling speed increases as the cursor moves towards the edges and decreases as it moves towards the center of the scroller area."hover-precise"Scrolling content with animation easing (non-linear mode) by hovering the cursor over the scroller. The scrolling speed and direction is directly affected by the cursor movement and position within the scroller.click-[number](e.g."click-80")
Scrolling content by clicking buttons. The scrolling amount is defined by type name, where [number] indicates a percentage of the scroller area."click-thumb"Scrolling each image/thumbnail at a time by clicking buttons. Each click will scroll the content by the width/height of the next non-visible adjusted image.
axis: "string"
- Define scroller axis (scrolling orientation).
Available values:"y","x","yx".axis: "y"– vertical scrolleraxis: "x"– horizontal scroller (default)axis: "yx"– vertical and horizontal scroller (useful when panning images or switching axis on-the-fly)
speed: integer
- Set the scrolling speed (higher=faster). Default value is
15.
contentTouchScroll: integer
- Enable or disable content touch-swipe scrolling for touch-enabled devices.
To completely disable, setcontentTouchScroll: false. Integer values define the axis-specific minimum amount required for scrolling momentum (default value is25).
markup:{ thumbnailsContainer: "string" }- Set the element containing your thumbnails. By default, this is an unordered list (
ul).
markup:{ thumbnailContainer: "string" }- Set the element containing each thumbnail. By default this is a list-item (
li).
markup:{ thumbnailElement: "string" }- Set the actual thumbnail element. By default, this is an image tag (
img).
advanced:{ autoExpandHorizontalScroll: boolean }- Auto-expand content horizontally (for
"x"or"yx"axis).
If set totrue(default), content will expand horizontally to accomodate any floated/inline-block elements (such asli,a,imgetc.).
advanced:{ updateOnContentResize: boolean }- Update scroller(s) automatically on content, element or viewport resize. The value should be
true(default) for fluid layouts/elements, adding/removing content dynamically, hiding/showing elements etc.
advanced:{ updateOnImageLoad: boolean }- Update scroller(s) automatically each time an image inside the element is fully loaded. The value is
trueby default.
advanced:{ updateOnSelectorChange: "string" }- Update scroller(s) automatically when the amount and size of specific selectors changes.
Useful when you need to update the scroller(s) automatically, each time a type of element is added, removed or changes its size.
For example, settingupdateOnSelectorChange: "ul li"will update the scroller each time list-items inside the element are changed. Setting the value totrue, will update the scroller each time any element is changed. To disable (default) set tofalse.
theme: "string"
- Set a ready-to-use scroller theme (plugin’s CSS contains all themes).
callbacks:{ onInit: function(){} }- A function/custom code to execute when the scroller has initialized (callbacks demo).
Example:
callbacks:{
    onInit:function(){
      console.log("scroller initialized");
    }
}
callbacks:{ onScrollStart: function(){} }- A function/custom code to execute when scrolling starts (callbacks demo).
Example:
callbacks:{
    onScrollStart:function(){
      console.log("scroll started");
    }
}
callbacks:{ onScroll: function(){} }- A function/custom code to execute when scrolling is completed (callbacks demo).
Example:
callbacks:{
    onScroll:function(){
      console.log("scroll completed");
    }
}
callbacks:{ onTotalScroll: function(){} }- A function/custom code to execute when scrolling is completed and content is scrolled all the way to the end (bottom and/or right) (callbacks demo).
Example:
callbacks:{
    onTotalScroll:function(){
      console.log("Scrolled to 100%");
    }
}
callbacks:{ onTotalScrollBack: function(){} }- A function/custom code to execute when scrolling is completed and content is scrolled back to the beginning (top and/or left) (callbacks demo).
Example:
callbacks:{
    onTotalScrollBack:function(){
      console.log("Scrolled back to 0%");
    }
}
callbacks:{ onTotalScrollOffset: integer }- Set an offset for the onTotalScroll callback option.
For example, settingonTotalScrollOffset: 100will trigger the onTotalScroll callback 100 pixels before the end of scrolling is reached.
callbacks:{ onTotalScrollBackOffset: integer }- Set an offset for the onTotalScrollBack callback option.
For example, settingonTotalScrollBackOffset: 100will trigger the onTotalScrollBack callback 100 pixels before the beginning of scrolling is reached.
callbacks:{ whileScrolling: function(){} }- A function/custom code to execute while scrolling is active (callbacks demo).
Example:
callbacks:{
    whileScrolling:function(){
      console.log("scrolling...");
    }
}
callbacks:{ alwaysTriggerOffsets: boolean }- Control the way onTotalScroll and onTotalScrollBack offsets execute.
By default, callback offsets will trigger repeatedly while content is scrolling within the offsets.
SetalwaysTriggerOffsets: falsewhen you need to trigger onTotalScroll and onTotalScrollBack callbacks only once.
live: boolean, "string"
- Enable or disable the creation of scroller(s) on all elements matching the current selector, now and in the future.
Setlive: truewhen you need to add scroller(s) on elements that do not yet exist in the page. These could be elements added by other scripts or plugins after some action by the user.
If you need at any time to disable or enable the live option, setlive: "off"and"on"respectively.
You can also tell the script to disable live option after the first invocation by settinglive: "once".
liveSelector: "string"
- Set the matching set of elements to apply a scroller, now and in the future.
Plugin methods
Methods are ways to execute various scroller actions programmatically from within your script(s).
update
Usage $(selector).mThumbnailScroller("update");
Call the update method to manually update existing scrollers to accomodate new content or resized element(s). This method is by default called automatically by the script (via updateOnContentResize option) when the element itself and/or its content size changes.
scrollTo
Usage $(selector).mThumbnailScroller("scrollTo", position, {options});
Call the scrollTo method to scroll content to the position parameter. Position parameter can be a string (e.g. "#element-id", "bottom", "left" etc.), an integer indicating number of pixels (e.g. 100), an array for y/x axis (e.g. [100,100]), a js/jQuery object, a function etc. method demo
scrollTo position parameter
Position parameter can be:
"string"- Element selector
For example, scroll to element with id “element-id”:
$(selector).mThumbnailScroller("scrollTo","#element-id"); - Special pre-defined position
For example, scroll to right:
$(selector).mThumbnailScroller("scrollTo","right");Pre-defined position strings:
"bottom"– scroll to bottom"top"– scroll to top"right"– scroll to right"left"– scroll to left"first"– scroll to the position of the first element within content"last"– scroll to the position of the last element within content
- Number of pixels less/more: (e.g.
"-=100"/"+=100")
For example, scroll by 100 pixels right:
$(selector).mThumbnailScroller("scrollTo","-=100");
- Element selector
integer- Number of pixels (from left and/or top)
For example, scroll to 100 pixels:
$(selector).mThumbnailScroller("scrollTo",100);
- Number of pixels (from left and/or top)
[array]- Different y/x position
For example, scroll to 100 pixels from top and 50 pixels from left:
$(selector).mThumbnailScroller("scrollTo",[100,50]);
- Different y/x position
object/function- jQuery object
For example, scroll to element with id “element-id”:
$(selector).mThumbnailScroller("scrollTo",$("#element-id")); - js object
For example, scroll to element with id “element-id”:
$(selector).mThumbnailScroller("scrollTo",document.getelementbyid("element-id")); - function
For example, scroll to 100 pixels:
$(selector).mThumbnailScroller("scrollTo",function(){ return 100 });
- jQuery object
scrollTo method options
speed: integer
- Scrolling speed.
Example:
$(selector).mThumbnailScroller("scrollTo", "-=200", {
  speed: 30
});
duration: integer
- Scrolling animation duration, value in milliseconds.
Example:
$(selector).mThumbnailScroller("scrollTo", "right", {
  duration: 1000
});
easing: "string"
- Scrolling animation easing, values:
"easeInOut""easeOut""easeInOutSmooth""easeOutSmooth""easeInOutStrong""easeOutStrong""easeInOut""easeInOut"
Example:
$(selector).mThumbnailScroller("scrollTo", 300, {
  easing: "easeOutSmooth"
});
callbacks: boolean
- Trigger user defined callbacks after scroll-to event is completed, values:
true,false.
Example:
$(selector).mThumbnailScroller("scrollTo", "top", {
  callbacks: false
});
timeout: integer
- Method timeout (delay). The default timeout is 60 (milliseconds) in order to work with automatic scroller update functionality, value in milliseconds.
Example:
$(selector).mThumbnailScroller("scrollTo", "last", {
  timeout: 0 //no timeout
});
stop
Usage $(selector).mThumbnailScroller("stop");
Stops running scrolling animations. Usefull when you wish to interrupt a previously scrollTo call.
disable
Usage $(selector).mThumbnailScroller("disable");
Calling disable method will temporarily disable the scroller(s). Disabled scrollers can be re-enabled by calling the update method.
To disable a scroller and reset its content position, call the method by setting its reset parameter to true:
$(selector).mThumbnailScroller("disable", true);
destroy
Usage $(selector).mThumbnailScroller("destroy");
Calling destroy method will completely remove the scroller and return the element to its original state.
Scroller styling & themes
You can style your scroller(s) using jquery.mThumbnailScroller.css which contains the basic/default styling and few ready-to-use themes.
You can modify the default styling or an existing scroller theme directly, clone a theme and change it to your needs or overwrite the CSS in another stylesheet. If you wish to maintain compatibility with future plugin versions (that may include an updated version of jquery.mThumbnailScroller.css), I recommend using your own custom (or cloned) theme (creating your own custom theme), or overwriting the CSS. This way you can always upgrade jquery.mThumbnailScroller.css without having to redo your changes.
Themes
Plugin’s CSS includes a number of ready-to-use themes for quickly applying a basic styling to your scroller(s). To apply a theme, use theme option parameter:
$(selector).mThumbnailScroller({
    theme: "theme-name"
});
or the HTML data attribute data-mts-theme in your markup:
<div class="mThumbnailScroller" data-mts-theme="theme-name">...</div>
creating your own custom theme
User-defined callbacks
You can trigger your own js function(s) by using plugin’s callbacks option parameter (see all availbale callbacks in configuration section). Some examples:
$(selector).mThumbnailScroller({
    callbacks:{
        onScroll: function(){ /* do something */ }
    }
});
$(selector).mThumbnailScroller({
    callbacks:{
        onTotalScroll: function(){ myFunction(); }
    }
});

function myFunction(){
   /* do something */
}
The plugin returns a number of values and objects that can be used inside the callbacks
this– the scroller elementthis.mts.content– the scrollable element containing the content (e.g. theulelement) as jquery objectthis.mts.top– content’s top position (pixels)this.mts.left– content’s left position (pixels)this.mts.topPct– content vertical scrolling percentagethis.mts.leftPct– content horizontal scrolling percentagethis.mts.direction– content’s scrolling direction (returns"x"or"y")
Plugin dependencies & requirements
- jQuery version 1.6.0 or higher
License
This work is released under the MIT License.
You are free to use, study, improve and modify it wherever and however you like.
https://opensource.org/licenses/MIT
Donating helps greatly in developing and updating free software and running this blog 🙂
Great plugin, easy to implement and great features, thanks for sharing it!
Hi,
This plugin does not seems to work with jquery tabs
https://jqueryui.com/tabs/
I implemented 3 vertical scroller in 3 tabs, but only the first one seems to be working…others are not…
If you have any idea please let me know your valuable thoughts.
Thanks and Regards – Arin
This doesn’t seem to work with mobile. Do you have any suggestions? I can’t get it to work natively on smart phones and tablets.
Hello,
This scroller is used with in a wordpress theme and we have discovered an issue.
When you load the page:
http://www.ceug2014.ca/
The scoller loads fine, however, when you shift-f5 (shift refresh), the first image is displayed, and all other images are then added below vertically even though the code states to be horizontal.
Do you have any fixes for this?
Hello,
I’m using this plug-in to create a tabbed menu which scrolls left and right. The links of the tabs lead to different pages which all have this control. I’ve managed to make the appropriate tab “active” when I navigate to that page.
The problem I’m having is that if the tab for this page is outside of the scroll area, when the page loads, the scroller is “not scrolled” to that position (the tab is correctly made active, but I can’t see it until I scroll)
Is there any way I can make the scroller scroll to specific position when the page loads?
Thanks in advance
Quisiera hacer un fullscreen, se puede hacer en este tema
Hi! such a great scroll! so cute too! I’m having trouble using lightbox in it though… it just doesn’t seem to work, any ideas why?
It looks like this:
<div id="tS2" class="jThumbnailScroller">
       <div class="jTscrollerContainer">
            <div class="jTscroller">
                <a href="<?=base_url();?>img/proyectos/fashionZone1.jpg"  data-lightbox="fashionZone"><img src="<?=base_url();?>img/proyectos/fashionZoneThumb1.jpg" /></a>
                <a href="<?=base_url();?>img/proyectos/fashionZone2.jpg"  data-lightbox="fashionZone"><img src="<?=base_url();?>img/proyectos/fashionZoneThumb2.jpg" /></a>
                <a href="<?=base_url();?>img/proyectos/fashionZone3.jpg"  data-lightbox="fashionZone"><img src="<?=base_url();?>img/proyectos/fashionZoneThumb3.jpg" /></a>
                <a href="<?=base_url();?>img/proyectos/fashionZone4.jpg"  data-lightbox="fashionZone"><img src="<?=base_url();?>img/proyectos/fashionZoneThumb4.jpg" /></a>
                <a href="<?=base_url();?>img/proyectos/fashionZone5.jpg"  data-lightbox="fashionZone"><img src="<?=base_url();?>img/proyectos/fashionZoneThumb5.jpg" /></a>
                <a href="<?=base_url();?>img/proyectos/fashionZone6.jpg"  data-lightbox="fashionZone"><img src="<?=base_url();?>img/proyectos/fashionZoneThumb6.jpg" /></a>
                <a href="<?=base_url();?>img/proyectos/fashionZone7.jpg"  data-lightbox="fashionZone"><img src="<?=base_url();?>img/proyectos/fashionZoneThumb7.jpg" /></a>
            </div>
      </div>
        <a href="#" class="jTscrollerPrevButton"></a>
        <a href="#" class="jTscrollerNextButton"></a>
  </div>
thanks!
A.
hey, nice script!
i wonder if its possible to “jump” to a specified image inside the scroller?!
in fact i have a gallery page with little thumbnails. when a user clicks on one of the thumbnails he comes to a detailed side with the thumbnailscroller on top and a bigger view of the selected image below.
so i need to highlight/select the image that was clicked before…
is it possible?
if not, anybody here who knows a similar scroller with this feature?
In the jquery.thumbnailScroller.js file there is an error that makes that multiple scroller moves simultaneously, this lines solve the problem when the scrollers have prev/next buttons
27 var $scrollerNextButton=$this.parent().find(“.jTscrollerNextButton”);
28 var $scrollerPrevButton=$this.parent().find(“.jTscrollerPrevButton”);
welll you saved my day…
this is what exactly i was looking for..i just liked it..
great work by you…
thanks a lot for this..
I was wondering if there was a way to have the next and previous buttons to appear outside of the image scroller on the Type: clickButtons
Great Post Nice Plugin you saved my day.
Hi there!
Lovely scroller, thank you for developing it 🙂
I am trying to use this in coordination with Fancybox, but they two are conflicting. Do you have any suggestions on which plugin works to get the images to pop up in an overlay gallery?
Cheers!
Natalie
well yeah i have just used combination of lightbox with this amazing scroller you can check it by clicking on below link..
http://regalia.semicolon.us/rooms.php
how can I define both hoverPrice and clickbutton. I would like to have both, is this possible?
thanks
Hey is this project on GITHUB? This plugin doesnt work correctly when you resize the container. Im using this plugin on a project of mine and i re wrote some of the code to fix it.
Hey Rein,
I have the same problem at the moment with the thumbnail scroller – after I resized the scroller to a size, when I should not work anymore the content jumps from left to right. Maybe your solution would give me a clue, can you get in touch with me?
Thanks in advance 🙂
Chris
Hey Rein/Christoph,
I am having the same problem. Did the solution to the resize issue ever get posted anywhere?
Thanks,
Jared
I’ll post a new version of the script as soon as possible, which solves these issues
Your installation instructions are broken. Your script tag in particular. When I pasted in what you had told me to, it wouldn’t work. By copying your example it worked. Thanks, but please update your installation instructions.
how to use for three tabs . i used but it is not working
how to show scroll as showed in example 3
cool horizontal slider! love it… I’m pulling my hair out though trying to get some JS functionality. I want to add a simple image swap based on an onclick event. Any ideas? Even changing the visibility of the image onclick so it can “reveal” some content. (like flipping a playing card)
I can get it working with a JS function but the hidden image revealed after the onclick event always pushes to the top left of the container DIV jtscroller. Maybe there is a simpler way? Anyone tried this??
Thanks for the post . button click scroller just work in Firefox for me.
Not working in IE and Chrome.
Any suggesstions?!
Hi, first of all I want to thank you for the slider, is almost perfect for what I was looking for.
I just want to know if there’s any chance of including gif images format in the slider with the animations runing all the time.
And also, when I hover and the autoscroll stop I want to know if it can back the autoscroll again.
Thanks you again and wait your reply.
Is there any way to make the inner scrolling area to scroll less, say 1 image at a time or 2 or 3 instead of the full viewable width?
This is great , I would like to know how to retrieve which element/image is currently active either by name or id , is this possible?
Hi!
Great plugin! But I need to know one thing.. Is it possible to leave the first field of the slide always visible, also when I go down with the slide? Thank you very much!
Hey, i got this scroller to work but I need to know if there’s a way to stop it once i click on a div .. or disable it for a while then enable it back again
thank you
Hi, I like your work. Is there a limit to how many items can be in the scroller? thanks.
Hi Manos,
first I wanna thank you for this plugin. That’s what I was searching for and it works (nearly) perfect.
Unfortunately only ‘nearly’ because I found a little misbehavior of the plugin on Safari (Mac) when magnifying the page with cmd + (or even when making the page smaller with cmd -). In this state the plugin has an awkward behavior.
Maybe you can fix this problem or at least have an idea how to fix it so I’ll do it maybe by myself.
Thanks in advance,
Dennis
I was wondering if you ever got around to updating the scroller? You posted:
Next version will have many features regarding dynamic elements, such as adding/removing images and scrollers on-the-fly. I’m planning on making this plugin extremely flexible with user defined option parameters for each feature, callback functions, scroll-to method, thumbnail titles & descriptions etc.
I’m very interested in the callback functions. I’m currently using the scroller with a large number of images and each image links to its own webpage. If the visitor clicked on one of the last images, when they use the back button, they are sent back to the scroller page and have to scroll through the entire section to see the image they selected. It would be nice if they could go back to where they left off. If you fix this, I will donate to your site.
Thank you,
Dave
Fantastic!!!!!
Hello!, honestly i can’t really understand the codes caused this is my first time in javascript but i think you’re codes can be understandable as i read there syntax and sequences. all i want to know is how it works.
THANK YOU SO MUCH
Self study time starts now (^_^)