Simple jQuery fullscreen image gallery
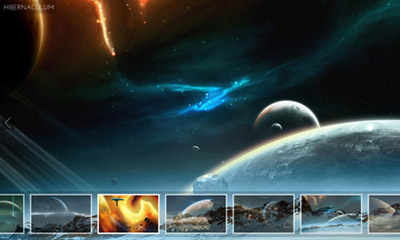
A fullscreen image gallery made with jQuery and CSS. The gallery features fullscreen images in various modes and custom thumbnail scrolling script.
The gallery was made by a combination of some previous scripts and tutorials posted on this blog. The images used on the demo are artwork of Tobias Roetsch.
Customization
The $defaultViewMode variable within the script, allows you to change the default images view mode. You can set the value to:
normal– images fit in window (all image data is visible)full– images expand to window size (fullscreen)original– images keep their original sizes (centered on the screen)
The rest of configuration options you can set within the script are:
$tsMargin– first and last thumbnail margin (for better cursor interaction)$scrollEasing– scroll easing amount (0 for no easing)$scrollEasingType– scroll easing type$thumbnailsContainerOpacity– thumbnails area default opacity$thumbnailsContainerMouseOutOpacity– thumbnails area opacity on mouse out$thumbnailsOpacity– thumbnails default opacity$nextPrevBtnsInitState– next/previous image buttons initial state (“hide” or “show”)$keyboardNavigation– enable/disable keyboard navigation (“on” or “off”)
I’ve included the complete gallery code on page 2 of this post.
Changelog
- Jan 23, 2011
- Gallery features next/previous image functionality via buttons and keyboard arrows
Thumbnails scrolling function has been optimized significantly
- Gallery features next/previous image functionality via buttons and keyboard arrows
License
This work is released under the MIT License.
You are free to use, study, improve and modify it wherever and however you like.
https://opensource.org/licenses/MIT
Donating helps greatly in developing and updating free software and running this blog 🙂
Pages: 1 2
I copied the code again and it is working. hmmm! I’m happy 😀
Hi again!
I have another question. Is it possible to get back the loading picture in full screen mode? Originally this line:
…because I miss it always when I’m clicking back on previous button.
Thanks again!
The loading icon is always visible. If the images are cached, they fade in and out almost instantly cause no preloading is needed.
Perhaps the problem is that the first thumb doesn’t work on slide bar.
Hello and thank you. Great job!
I just trying now the template and I’d like to ask you about the way how to get the portrait pictures in fit height?
And I have a flash menu bar with backgorund color under text but when I use the gallery template I loose this colour. Do you have any idea to change it?
Thank you!
Check your flash parameter wmode. It should be window.
When I change mode to window the landscape pictures don’t fill the browser and it would be great if portrait picture would be resized at the browser height and landscape picture to the width.
Is it possible?
Hi malihu, can we implement slider instead of fade in images & when we press up and down key bottom from keyboard thumbnail slider up and down. Thankyou in advanced for any help.
Hello,
It would be a completely new script as the code required to do what you suggest, differs a lot from the current one. If I get some time, I might develop a version of this gallery. Thanks for the suggestion!
Hello and thank you for all of your scripts!
I am putting together a site with multiple scrollers and a couple of gallery windows. I am not able to get the “normal” defaultViewMode to work on the other gallery windows except on the first mural gallery. Coffee on me for any relief you can bring me for this headache, make that 2 cups. My test page is at http://www.timscottdesigns.com/tester1.html
– thank you in advance for any help
I figured it out, coffee on me anyhow… cheers!
Thanks! I like the implementation of horizontal scrolling for your galleries 😉
Hi,
What a lovely gallery , nice job, and thanks alot for sharing.
I have the same issue that Alec, and I´m praying for your next/prev solution.
Thanks a lot
Your’e my hero!
I would like to learn jquery myself. Perhaps you would know best where I can begin? Do you have a few clear tutorials site for me?
Check these:
http://www.learningjquery.com
http://www.learningjquery.com/2010/07/great-ways-to-learn-jquery
http://www.quora.com/jQuery/What-are-the-best-websites-to-learn-jQuery
http://docs.jquery.com/Tutorials
Learning the basics of any scripting language is not that hard. Basically you need to create as many scripts as possible and view other people source code to gain some experience on how to code better.
If you have any background in scripting, javascript/jquery is fairly easy (if for example you’re familiar with actionscript, as I was, javascript is extremely easy to follow).
In my opinion 1-2 good books and Google is all you need 😉
Tnxs!
I only do HTML and CSS so there’s a lot i need to reed/learn. Do you know some good books?
Javascript:
JavaScript Step by Step
http://my.safaribooksonline.com/9780735624498
Sams Teach Yourself JavaScript in 24 Hours
http://1tl.gr/8A
JavaScript & DHTML Cookbook
http://1tl.gr/8B
jQuery:
jQuery: Novice To Ninja
http://www.sitepoint.com/books/jquery1/
jQuery Fundamentals
http://wiht.link/jquery_guide
Learning jQuery 1.3
https://www.packtpub.com/learning-jquery-1.3/book?mid=220409c024ep
hi,
Great slideshow! This is the best solution I could find for a fullscreen slideshow.
The only thing I am realy missing is the next and the prev. You already said we need tot look at the sideways slideshow. I am new with jquery en experimented a lot with both the slideshow but cant get the next en prev buttoms working.
I am guessing I first need to load the next image in the script but I don’t even know what I’m doing.
This is what I’ve made so far. The button is working but there’s no target.. Could you help me further?
jQuery("#next").click(function () { $bgimg.attr("src", "").attr("src", this); //change image source });Hello Alec,
I’m planning to implement a next/previous image function on this gallery, so if you could wait a bit I’ll let you know when it’s ready.
Hi again Alec,
I’ve finally implemented a next/previous image function on the gallery 🙂
Your scripts and tutorials are really awesome, thank you for all these great resources! Is there a way to make the images different sizes and and center in the div.? Right now I have a test page set up I am trying to configure at http://www.timscottdesigns.com/test.html
Hello and thanks a lot for your comments 🙂
The script has the ability to load different image sizes, landscape and/or portraits. Inside the script check the first line:
//set default images view mode
$defaultViewMode=”normal”; //full, normal, original
Setting the “defaultViewMode” variable to “original”, the large images won’t stretch or scale. If the original images width/height is less than the browser window, they’ll be centered inside it.
Thank you for your quick reply. I am trying to center the pictures inside a div smaller than the window size. How do I change the part in the following code to center off of a div instead of the window width and height?
//Image scale function
function FullScreenBackground(theItem,imageWidth,imageHeight){
var winWidth=$(window).width();
var winHeight=$(window).height();
if($toolbar.data(“imageViewMode”)!=”original”){ //scale
var picHeight = imageHeight / imageWidth;
var picWidth = imageWidth / imageHeight;
if($toolbar.data(“imageViewMode”)==”full”){ //fullscreen size image mode
if ((winHeight / winWidth) picHeight) {
$(theItem).attr(“width”,winWidth);
$(theItem).attr(“height”,picHeight*winWidth);
} else {
$(theItem).attr(“height”,winHeight);
$(theItem).attr(“width”,picWidth*winHeight);
};
}
$(theItem).css(“margin-left”,(winWidth-$(theItem).width())/2);
$(theItem).css(“margin-top”,(winHeight-$(theItem).height())/2);
} else { //no scale
$(theItem).attr(“width”,imageWidth);
$(theItem).attr(“height”,imageHeight);
$(theItem).css(“margin-left”,(winWidth-imageWidth)/2);
$(theItem).css(“margin-top”,(winHeight-imageHeight)/2);
}
}
Thank you again in advance, you can see what I am talking about at my previous comment link.
Hello again!
I’ve checked your page. In order to do what you describe, you should do the following:
a) Open scrthumb2.js and set the defaultViewMode to normal:
$defaultViewMode=”normal”;
b) Inside FullScreenBackground function, change the values of the first 2 variables (winWidth and winHeight) so they get the dimensions of bg div instead of window:
var winWidth=$(“#bg”).width();
var winHeight=$(“#bg”).height();
That’s all you need. If you copy-paste the code from this comment, remember to re-type the wordpress quotes 😉
Thank you so much. That is exactly what I was trying to do but had it on original and did not put the quotes around #div. Keep up the great work!!
nice tutorial, i have a full size gallery too on my portfolio at http://referenzen.webdesign-portfolio.de/ . hope you enjoy
Fantastic piece of work! Very fresh approach too.
One question if I may.
Is there a way to tie a link (say pointing to a new page) to the big image?
Again great work.
Best wishes
Charles
Hi Charles,
Yes you can wrap the large background image (img id=bgimg) inside an ancor link. Depending on how you want it to work, you would probably need to add the links addresses to each of your thumbnails (e.g. as a “rel” attribute on their ancor tags) and pass it to the large image when you click them via js.
If you provide more details I might be able to create a demo variation.
Thanks for your comments 🙂
Thanks for replying.
I mean clicking the background image (or maybe the title text which could contain a read more… hot link) might point to a new page with more detail regarding the big image.
Yes, it’s fairly simple 🙂
You need to wrap the large background image inside an anchor tag with a unique id (e.g. #bgimg_link).
Next, add a “rel” attribute on each one of the thumbnail links which will hold the additional url you want.
Finally, inside the script find the #outer_container click function and add a single line of code that’ll get the “rel” attribute of the thumbnail and set it as the href value of the #bgimg_link, for example:
$(“#bgimg_link”).attr(“href”,$this.attr(“rel”));
Oh well, I think it’s more simple to do it than describe it… I’ve made a script version here:
http://manos.malihu.gr/tuts/malihu-jquery-image-gallery/malihu-jquery-image-gallery_charles.html
😉
Sweet thanks a lot.
How do I still keep next ad previous buttons though?
Cheers
Hi,
What a lovely gallery 🙂
If you could make it accessible by arrow keys I would be very grateful.
Thank you in advance,
albert
albert, I updated the script and among others, I’ve added next/previous image navigation via buttons and keyboard arrows 😉
@malihu: thanks for your quick reply and edit of the code! This site is a great inspiration, will visit regularly!
I’ll update a bit the code in few days and I’ll try to implement and automate features mentioned in the latest comments. Thanks for the input everyone.
Edit: Done @mario, @Jim check the new code and re-download updated files.
Thanks I’ll check it now
Great script! Really like it, great job. I sorta have the same problem as Mario, wanting images to have a fixed size of 1024×768 and centered, instead of fullscreen. Is there a possibility to implement this, on way or another?
Thanks in advance!
Hello, wonderfull code
But i have a question:
I have images in 1680 x 375 and i want the BG div to be the same size as the images (1680×375), so i tried to change the code but the problem i got is when i do it the image shows like 1680×100 px, i don’t know what i’m doing wrong.
Also i want to set the DIV bg (where the images appear) in the middle of page or wherever i need.
Thank you in advance
Mario
Hi,
Your simple gallery is very great, thanks.
But i wonder if it could be possible to add a semi-transparent description at the bottom of each images?
Thanks in advance.
Hi Yannick,
The easiest way is to style #img_title div to how you want your description to look like. This div gets the contents of the title attribute of each image so adding your description to the title attributes will work just fine without any extra coding 😉
Ok, thanks, I’ll try it.
Just one thing more, why, when you maximise an image, you can’t scroll up to the top but only to the bottom?
@Yannick
Actually you should not be able to scroll the image at all. How/where that happens?
That happens on all my images, when I “Maximize”.
I can scroll to the top but not to the bottom…
Regard
better than supersized 2.0 with the thumbnail navigation…good.
even good if it have the easing sliding background instead of fade in out.
Thanks for your reply, i have another problem now however…
When i load a page, it only displays the loading icon…Not the slideshow.
But when i refresh the page, it appears just fine. Been messing around with the code but i’m not really good in Jquery so, perhaps you would be so nice to take a look?
Hello,
Does this happen in a particular browser? e.g. only on Firefox?
Hello ) Thank you first of all for great job you’ve made.
I have this problem too. After I placed my pictures, when I load a page I can see only loader on background and buttons. So, to see first pic I need to click next button. Is it possible to make first picture to load same moment the page is loaded?
I tried on opera and chrome
Does this happen when you check it locally? If yes, try to test it online and see if everything works ok.
Hi there, first of , real nice plugin!
I got it working pretty smooth over here, the only problem that i have, is that the thumbnails dont work :/
They don’t size down but it shows a piece of the large image at the bottom of the screen instead..
So i was wondering, could you explain me where you exactly create the thumbnails?
Thanx in advance!
Hello,
The thumbnails and the actual size images are located in the same folder (“images”). Notice that thumbnail files have a “_thumb” suffix in the filename. So you need to create the thumbnails for each of your images. Auto-sizing all the images would not be efficient and would affect performance and loading time significantly.
Hello !
you made such good work !
I wanna know if I could slow down abit the thumbnail scroller ?
it scroll abit too fast for me !
Thanks!
Hi Johnny,
The thumbnails container position depends on the position/movement of the cursor so you can’t really change the scolling “speed”. What you can do thought is play with the ease amount to make movement smoother or more exact. In the script, find the line:
var animSpeed=600; //ease amount
and change the 600 (milliseconds) to see the results.
Hi!
1) This gallry is awesome! 🙂
I’m using it to show off a really gorgeous collection of dresses by Kay Senchai.
I fiddled with the ease settings, however I think ifI were able to change the initial load, to show the images “as if the mouse were in the middle”, new visitors wouldn’t have the “big surprise” of images moving very fast, when they move the cursor over thumbs the first time they move their mouse to click. Any ideas on how to make it so that the “middle thumbs” are loaded?
is there a way to make it auto scroll? like fade in the next image after 4 secs or so…
Auto scroll implementation requires some additional coding. I’ll see if I can implement it on a future date (I’m a bit short on time at the moment) and let you know.
beautiful work you have done here.
is there a simple way to have the sideshow open straight away in full screen mode, instead of having it as an option. (so it’s always full screen)
i thank you in advance for your time
j
Hello Jamie and thanks for your comments.
To have full screen mode by default add this code in the script:
$toolbar.data(“imageViewMode”,”full”);
as the first thing inside $(window).load function.
Also you should change the upper-right image icon and link in the html by inserting this:
<a href=”#” title=”Restore” onClick=”ImageViewMode(‘normal’);return false” rel=”nofollow”><img src=”toolbar_n_icon.png” width=”50″ height=”50″ /></a>
inside the <div id=”toolbar”>
I have tried using you terrific ‘Pimp-my-Tooltips’ with this gallery and succeeded in sending the browser’s tooltips to 100000000 millisecond oblivion. Unfortunately, ‘title’ no longer appears in the upper left-hand corner of this image gallery.
Is there a way to make these two play nice together? Perhaps the gallery can use ‘alt’ or something? I’m new to this adapting scripts stuff and really appreciate your generosity.
thx
For the gallery to utilize “alt” instead of “title” attributes find the line “var title_attr=$this.children(“img”).attr(“title”);” (commented: get image title attribute) inside the script and simply change “title” to “alt” (e.g. var title_attr=$this.children(“img”).attr(“alt”);). This will also make tooltips plugin work along with the upper-left corner titles 😉
It works! I can now have a short description of each image in the ‘Title’ and no annoying tooltip popping up. Thank you so very much.
hey
is there any way to make the thumbs not to fade if you not rolling over them with the mouse?
Hi,
Yes. To completely disable the fade effect of the thumbs just delete or convert to comment (add “/*” at the beginning and “*/” at the end) this block:
/* $outer_container.fadeTo(fadeSpeed, 0.8);
$outer_container.hover(
function(){ //mouse over
var $this=$(this);
$this.stop().fadeTo(“slow”, 1);
},
function(){ //mouse out
var $this=$(this);
$this.stop().fadeTo(“slow”, 0);
}
); */
Alternatively, inside the code above you can change the fade-in/out value of the thumbs block for mouse-over and mouse-out by changing the values of 1 and 0 inside $this.stop().fadeTo(“slow”, 1); lines. A value of 1 means no transparency, value 0.5 for semi-transparency, 0 for complete transparency etc.
I am really enjoying using this elegant gallery (if you care to take a look, it’s at my website address above)
Is there any way to disable a user’s browser tool-tips though?
I keep getting the titles of the images popping up over the large images and the thumbnails. I wanted to give image descriptions by putting them into the titles, and it did work, except the tooltips are now huge!
Help?
thx
Hi Ron,
The browser tooltips appear when elements (such as images) have the title attribute (e.g. title=”image title”). If you remove the titles from the images you won’t get any tooltips. I strongly suggest though that if you want a description for images you should leave titles or at least give images alt attributes (e.g. alt=”your description”).
I meant Keyboard arrow keys**
I’ll probably give it a try when I have time. Thanks for the suggestion.
Edit: Done! (finally…)
Nice… Now only if it had support for arrow keys for navigation prev/next image
Great code! I’m working on a site using your fullscreen image gallery and one set of images is 1654 by 1654 px, while another is 1654 by 2828 px. The image is centred when it’s fullscreen, which is great; that’s exactly what I want. But while I can scroll down to see the bottom portion of these images (again at fullscreen), I can’t scroll up to see the top. Any suggestions on how best to tweak this?
Hi,
I need to see an example and the code of what you described in order to help. On this script, by default you see all portion of images (landscape and portrait). If you change the view mode to “maximize” (upper right corner icon) images are displayed in full-size which is ideal for landscape images since the majority of displays and monitors are widescreen.
this is such a killer gallery, thank you. my question is similar to @Werner’s: when “maximized” i can’t scroll vertically, is there a way to include that? also, on your sideways gallery you have an “original” view mode as well and although i see mention of it in the tut and code i couldn’t figure out how to do it (horizontal scroll in this case would be great). thanks again.
Great tutorial!
How can I use the function “clicking on large image loads the next one” like in the SIDEWAYS tutorial?
Thanks a lot
In order to work, it needs extra coding and you can’t just copy the function from the other script. Unfortunately I don’t have time to implement this feature on this gallery at the moment (maybe in the coming weeks). To be honest, it seems a bit overkill to have that feature on this script cause you already have all the thumbs in the same place as the large image.
Angel, I updated the script and added next/previous image navigation via buttons and keyboard arrows 😉
You can also just added the “nextImageBtn” link around the large image in your HTML. Just be sure to specify the styles for this class in your css so the button style doesn’t effect this big link!
Awesome m8. U have some great tutorials.
Is this slideshow cross-browser compatible?
cheers
Keep up the excellent work
Thanks 🙂 I’ve checked it on the latest versions of Opera, Firefox, Safari, Chrome and IE8. Should work on older browsers too.