Page scroll to id for WordPress tutorial
Basic tutorial for using “Page scroll to id” WordPress plugin on your WordPress site.
- Creating id targets
- Creating links
- Links highlighting
- Offset scrolling for sticky menus
- Scrolling from/to different pages
- Video tutorial
In order to use the plugin on your WordPress site (after installing and activating it), you need to do the following:
- Create id targets the page will scroll to or find existing id attributes in your theme to use with your links.
- Create links that point to those targets or enable the plugin on links that already exist in your site.


Creating id targets
Creating id targets in post block editor (Gutenberg)
You can create your targets in more than one ways in the block editor, e.g. using the group block, the “Page scroll to id target” block, the shortcode block, block class attribute, HTML anchor field etc.
Create id targets using the group block
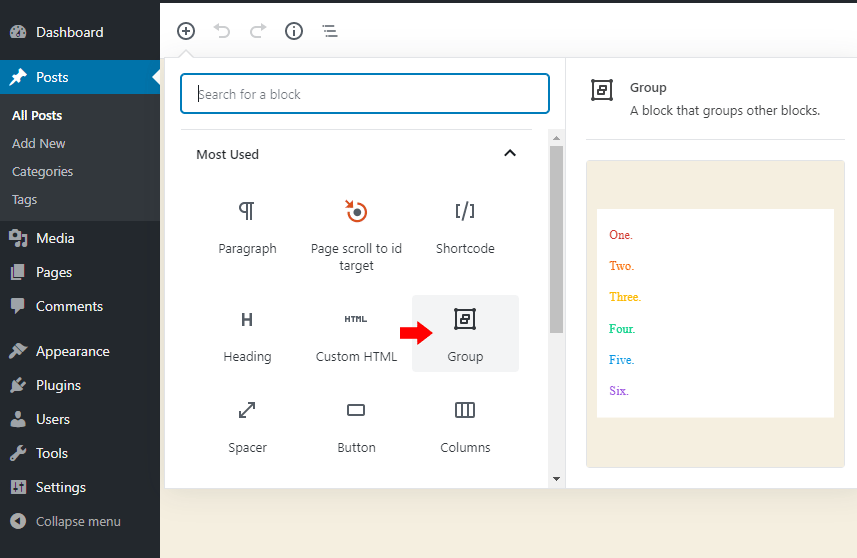 Click on the “Add block” icon and select “Group”. This will insert a general container block that can group other blocks and we can add the
 id on this group/general container block.
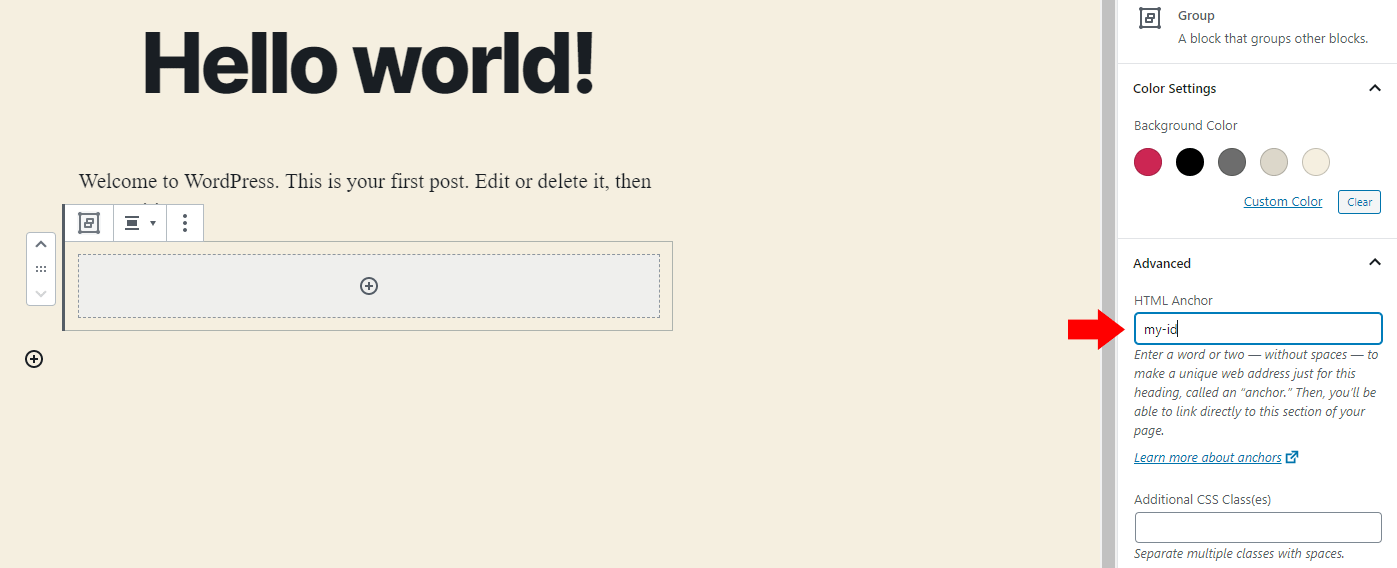 On the group block properties (right panel) you can add the id you want in the “HTML Anchor” field.
Create id targets using the “HTML Anchor” field
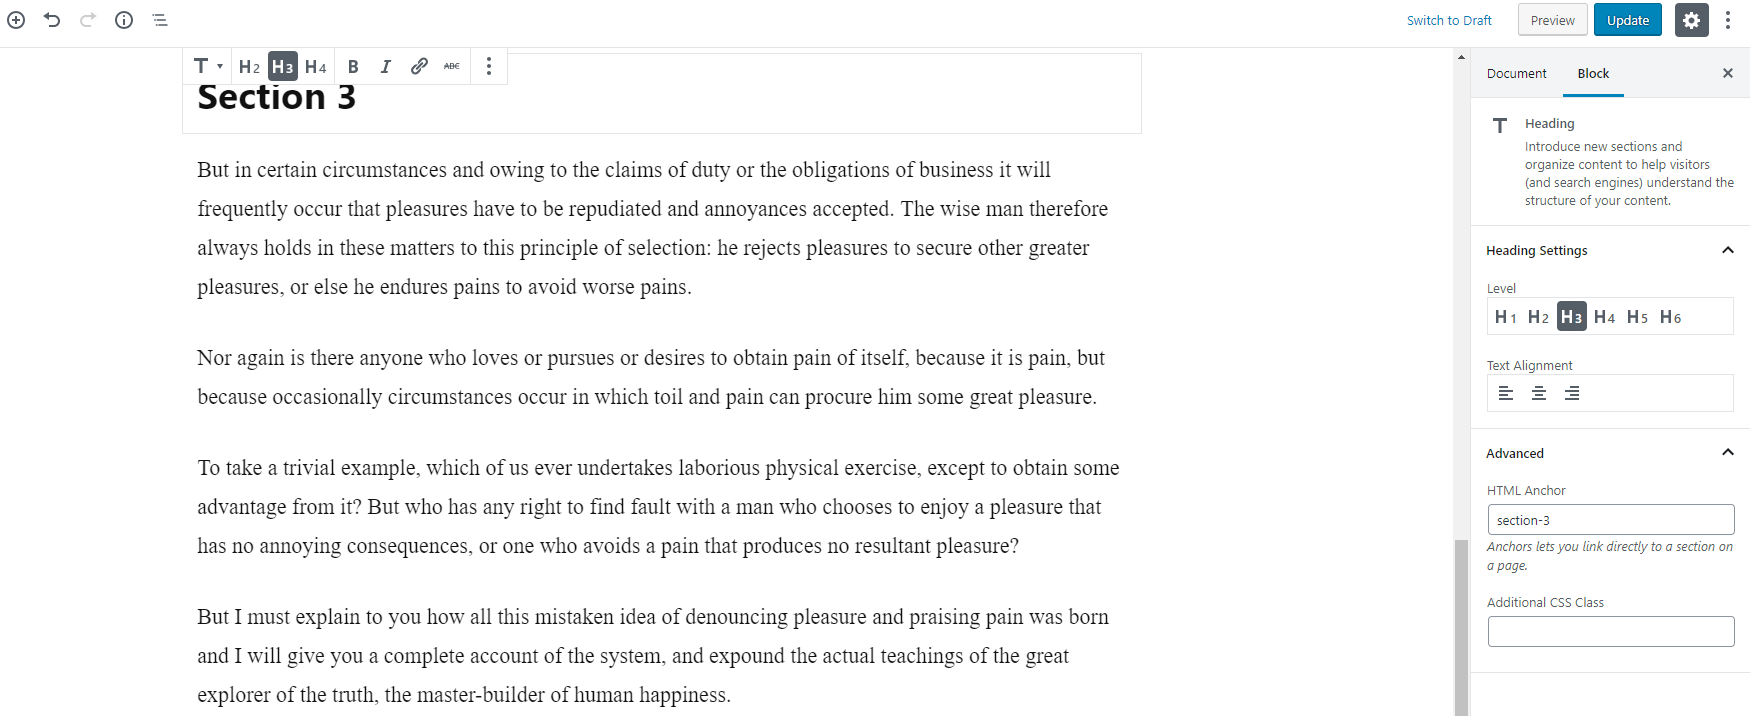
If you use headings in your content, you can use the “HTML Anchor” attribute of blocks to set a target id. Select your block, click “Advanced” in the right panel and insert the target id you want in the “HTML Anchor” field.
Create id targets using plugin’s “Page scroll to id target” block
The plugin has its own custom block for inserting targets: “Page scroll to id target”

Create id targets using “Additional CSS Class(es)” field
You can generate id targets for any block element, by setting its class name to: ps2id-id-yourid, changing the yourid part to the id value you want.
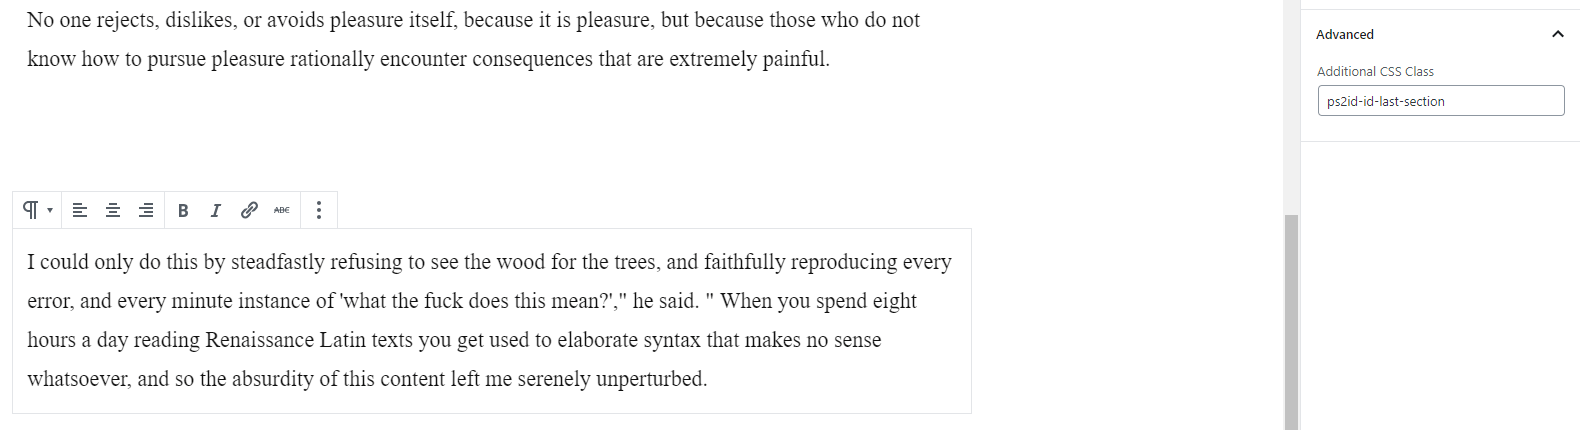 Click on a block element (e.g. a paragraph), click “Advanced” in the right panel and set the target id you want in the “Additional CSS Class” in the form of:
ps2id-id- plus the id you want.
For example, if you want to create the target id “last-section”, give the element the CSS class:
ps2id-id-last-section.
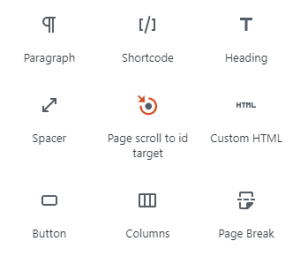
Create id targets using the shortcode block
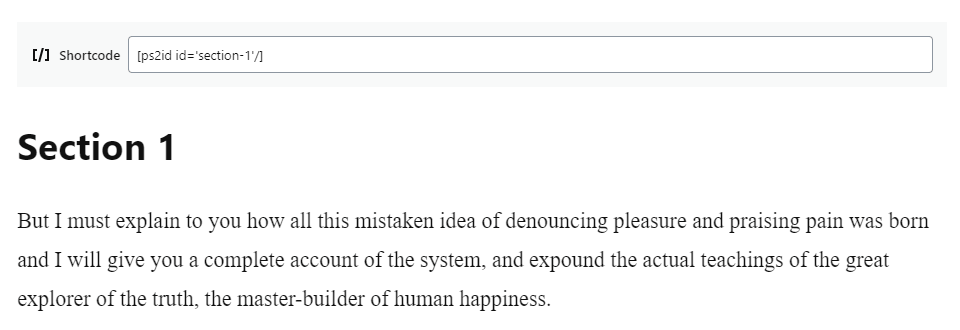 You can use plugin’s shortcodes in the block editor. Click on the “Add block” icon and select “Shortcode”.
Add the [ps2id id='section-1'/] in the shortcode field to create a target with id section-1.
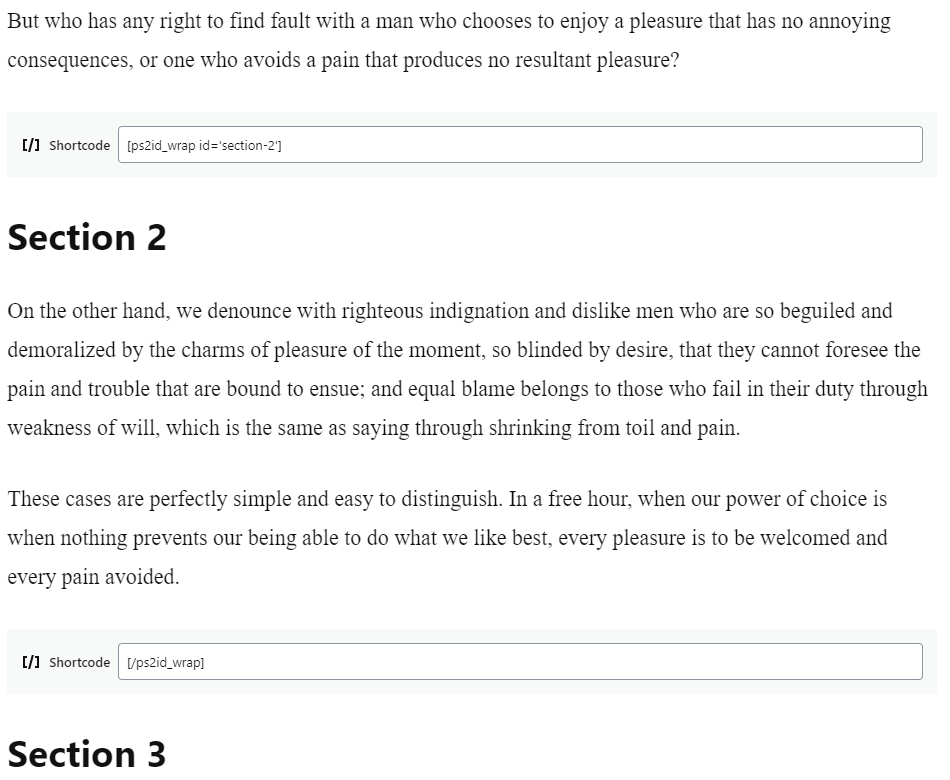 You can also use the
 [ps2id_wrap] shortcode accordingly.
Creating id targets in post visual editor (classic “old” editor)
 In post visual editor, click the toolbar button “Insert Page scroll to id target” to create a target at the cursor position in the editor.
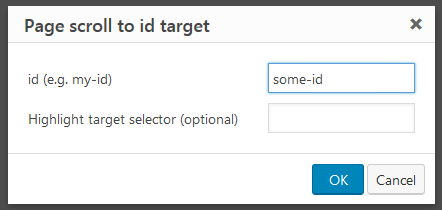 In “Page scroll to id target” modal insert the id value you want (e.g.
 some-id) and click “OK”. The target shortcode (e.g. [ps2id id='some-id' target=''/]) will appear in the editor. Update/save the post/page. You can now use this id value in your link(s) URL (e.g. #some-id).
Creating id targets in post editor via shortcodes
In post visual or text editor, enter [ps2id id='some-id'/] in the place you want to create the target and set the id attribute to the value you want. This will create a simple anchor-point target. If you want to wrap your content (or part of your content) in a target id (same as adding an id attribute to some content), use the [ps2id_wrap] shortcode:
[ps2id_wrap id='some-id']
your content...
[/ps2id_wrap]
Update/save the post/page so you can use this target value in your link(s) URL (e.g. #some-id).
Click here for more info on target shortcodes
Creating id targets in HTML
Wrap your content in a div with an id attribute (recommended for better link highlighting) or add simple anchor points (with id attributes) before each content section. Examples:
<div id="section-1">
  <p>Section 1 content...</p>
</div>

<div id="section-2">
  <p>Section 2 content...</p>
</div>

<div id="section-3">
  <p>Section 3 content...</p>
</div>
<a id="section-1"></a>
<p>Section 1 content...</p>

<a id="section-2"></a>
<p>Section 2 content...</p>

<a id="section-3"></a>
<p>Section 3 content...</p>
Creating id targets in WordPress widget areas
Create targets in your widget areas (Appearance → Widgets) via plugin’s “Page scroll to id target” widget.
Keep in mind that all WordPress widgets have existing id values that you can use with your links. You can find these id values within each active widget under “Page scroll to id target” label. The option to display these values is “Display widgets id attribute” which is enabled by default.
FAQ
Creating links
Creating links in WordPress Menus
 The plugin is enabled by default on WordPress Menu links (Appearance → Menus), so you can start adding custom links and set their URL to the id/target you want to scroll to.
Edit your menu and add “Custom links” as these type of links allow us to enter a custom URL with the id we want. Your links URL should be in the form of #some-id, http://my-site.com/page/#some-id, /page/#some-id etc.
Please note that if you want your links to work from other/different pages, you’ll need to insert the full address with the target id in their URL (e.g. http://my-site.com/page/#some-id) or the relative-root URL (e.g. /page/#some-id).
 In Appearance → Menus, click “Screen Options” at the top and make sure “CSS Classes” is checked. Edit each link you’ve created and insert the
 ps2id value in “CSS Classes” field.
In addition to using the class field, the same can be done using the “Link Relationship” field (i.e. rel attribute). Click “Screen Options” at the top and make sure “Link Relationship (XFN)” is checked. Edit each link and insert the m_PageScroll2id value in “Link Relationship (XFN)” field.
Any menu item/link with ps2id class or m_PageScroll2id rel attribute will be handled by the plugin.
Creating links in post block editor (Gutenberg)
You can use plugin’s shortcodes in the block editor. Add the shortcode: [ps2id url='#some-id']link text[/ps2id] inside any block element to create a link that points to the “some-id” target.
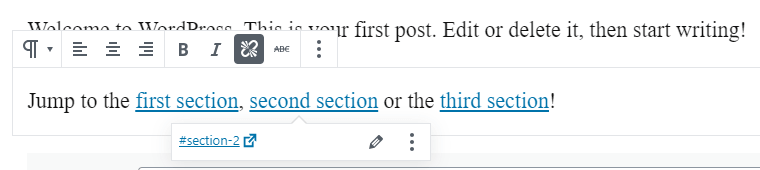 Keep in mind that since “Page scroll to id” version 1.6.3, the plugin is enabled by default on all links with a non-empty hash value (e.g.
 #some-id) in their URL. This means that you don’t have to use plugin’s shortcode to create links, as any link you create via the WordPress editor will work.
Creating links in post visual editor (classic editor)
 In post visual editor, click the toolbar button “Insert/edit Page scroll to id link” to create a link at the cursor position in the editor or from text you’ve already selected.
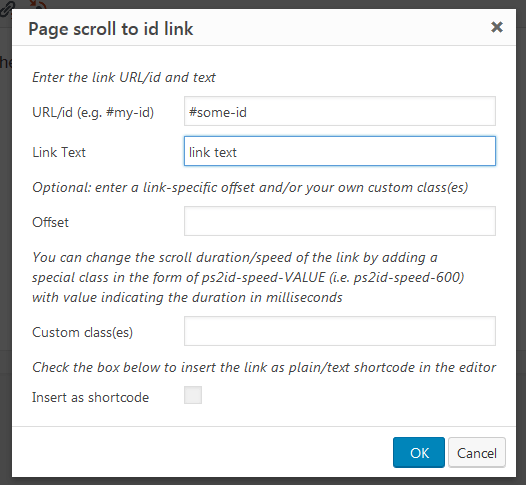 In “Page scroll to id link” modal insert the link’s URL and text. The URL should be in the form of
 #some-id, http://my-site.com/page/#some-id, /page/#some-id etc. When ready, click “OK” and the link will appear in the editor. You can edit the link via both “Insert/edit link” and “Insert/edit Page scroll to id link” buttons, as well as inline.
“Page scroll to id link” modal provides additional options like “Offset” and “Custom class(es)” that can be used to change link’s offset, its scroll duration/speed etc.
Creating links in post editor via shortcodes
In post visual or text editor, enter [ps2id url='#some-id']link text[/ps2id] in the place you want to create the link and set the url attribute and link’s text to the values you want. The shortcode provides the same options as plugin’s “Insert/edit Page scroll to id link” toolbar button via attributes.
Creating links manually
Any link with ps2id class or m_PageScroll2id rel attribute value will be handled by the plugin. For example:
<a href="#some-id" class="ps2id">link text</a>
<a href="#another-id" rel="m_PageScroll2id">link text</a>
Enabling the plugin on links that already exist in your site
You can instruct “Page scroll to id” to handle any link in your page(s) by using the “Selector(s)” field in plugin settings.
If you need to enable “Page scroll to id” on all links with URL containing a hash (#), insert the following value in “Selector(s)” field:
a[href*=#]:not([href=#])
Click here for more info on “Selector(s)”
FAQ
- How do I make my links work from any page in my site?
- Can I have links with different offsets?
- How to make the plugin work with WordPress Menu links?
- Can I have links with different scroll duration/speed?
Links highlighting
Each time a target element is visible on the screen (i.e. is within the viewport), the plugin adds the mPS2id-highlight class to its associated link or links (i.e. the links that scroll to this target). You can use this class in your theme’s stylesheet or custom CSS to style the current/active link(s), e.g.
a.mPS2id-highlight{ background: #ff0; }
Common case scenario and example
Lets say you have a sticky menu containing links that scroll to various targets/sections within the page. Your links text color is black (which may be set by your theme or some other stylesheet):
.memu-item a{
    color: black;
}
When scrolling through page sections (i.e. targets) you want the link of the visible/current target to become red. You can do this by adding the following CSS:
.memu-item a.mPS2id-highlight{
    color: red;
}
Notes and more info
The default highlight classes for the links are: mPS2id-highlight, mPS2id-highlight-first and mPS2id-highlight-last (you can change these class-names in plugin’s settings if you want).
For more information about the highlight classes and options see “Classes & highlight options”, “Highlight selector(s)” and FAQ below.
FAQ
- How do I make my links stay highlighted for longer distance while scrolling?
- Multiple links get highlighted! How to highlight only one?
Offset scrolling for sticky menus
If your page has a top sticky/fixed-positioned menu, you’ll probably need to use plugin’s “Offset” option in order to prevent the menu from overlapping your content. This option allows us to shift (i.e. offset) scrolling, so in the case of a top sticky menu, we usually need to “stop” scrolling a few pixels before the target reaches the top of the page (to accommodate for the space the sticky menu occupies).
Go to Settings → Page scroll to id → Offset and insert an offset amount equal to your sticky menu height (in pixels). You can insert its height value as a number (e.g. 100) or you can insert your menu selector (e.g. #my-sticky-menu), so the plugin calculates its height automatically.
The plugin provides special selector expressions in order to define advanced offsets and work with responsive menus. For more info see “Offset” option.
Scrolling from/to different pages
The plugin has the option to scroll from/to different pages enabled by default. This means that when you click a link which points to a target id on another page, you’ll still get the smooth scrolling effect which will happen immediately after that page is fully loaded.
The only thing you’ll need is to make sure your links have the full address with the target id in their URL (e.g. http://my-site.com/page/#some-id).
Dear All!
The Plugin works well on Desktop! Many thanks for that!
But on mobile phone (tested on Android) it does not work out of the menu on top of the site. (Burger Menu with 3 lines)
Did i made a mistake in the configuration?
What can i do to solve the issue?
Sooo many thanks,
Josef
Hi, please see my reply:
https://manos.malihu.gr/how-to-close-mobile-menu-with-page-scroll-to-id/comment-page-2/#comment-24775
Sorry, my question was supposed to say “aren’t taking you”.