Slidebox – jQuery banner rotator
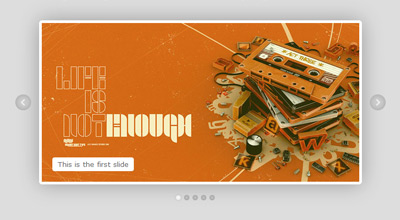
Slidebox is a classic, simple jquery/css banner rotator/slideshow featuring slide captions, next and previous slide buttons, slides micro-thumbnails, carousel-like rotation and auto-slideshow.
How to use it
Download slidebox archive which contains the plugin files, as well as examples and some demo graphics. Extract files and upload jquery.mSimpleSlidebox.js, jquery.mSimpleSlidebox.css and the images, icons etc. you’ll use (if any) to your web server.
Include jquery, jquery UI, jquery.mSimpleSlidebox.css and jquery.mSimpleSlidebox.js in your html document
<link rel="stylesheet" href="jquery.mSimpleSlidebox.css">
<script src="http://ajax.googleapis.com/ajax/libs/jquery/1.6/jquery.min.js"></script>
<script src="http://ajax.googleapis.com/ajax/libs/jqueryui/1.8/jquery-ui.min.js"></script>
<script src="jquery.mSimpleSlidebox.js"></script>
The code above can be inserted inside the head tag or at the very bottom of your document, before the closing body tag (which is normally recommended for better performance). In either case, it’s more efficient to include the css file before any javascript (usually inside the head tag). Notice that we’re using Google’s CDN to get jquery and jquery UI libraries (why?).
What these files do
jquery is the javascript library used by the slidebox plugin (I’m making the crazy assumption here that you do know what jquery is. In case you don’t, here it is).
jquery UI (jQuery User Interface) extends jquery library and provides animation easing (you can make your own custom jquery UI bundle if you wanna cut down the size, see http://jqueryui.com/download).
jquery.mSimpleSlidebox.js is our plugin file (this does all the tricks)
jquery.mSimpleSlidebox.css is the css file we use to style our slideboxes. You could of course put slidebox styling in your main stylesheet document to reduce http requests.
Insert slidebox markup in your html body
<div class="slidebox">
    <ul>
        <li>
            <div>slide 1 content</div>
        </li>
        <li>
            <div>slide 2 content</div>
        </li>
        <li>
            <div>slide 3 content</div>
        </li>
        <li>
            <div>slide 4 content</div>
        </li>
    </ul>
</div>
Each slidebox is marked-up as an unordered list (<ul>), wrapped in a div which can have any id or class name (in this case .slidebox). Each list item (<li>) represents a single slide and each slide contents are within a div (or any element of your choice). Simple and clean.
Call mSlidebox function on document ready or window load (after the inclusion of the plugin files), either in the head or body tag
<script>
    (function($){
        $(document).ready(function(){
            $(".slidebox").mSlidebox();
        });
    })(jQuery);
</script>
The .slidebox selector used here could be anything you want (any id, class name etc.) as long as it’s the same in your slidebox(es) markup. Note that we’re wrapping our jquery code with (function($){ ... })(jQuery);. This ensures no conflict between jquery and other libraries using $ shortcut. See Using jQuery with Other Libraries for more info.
Calling our function on document ready ($(document).ready()) is the standard, most common way used. It roughly means that our code will execute after the DOM is ready. When manipulating images or document sections that contain images and other objects that load separately, it is best to use window load ($(window).load()) so the code executes after all page elements are fully loaded.
In the example below, slidebox plugin will be applied after all page elements (such as slide images, backgrounds etc.) are fully loaded:
<script>
    (function($){
        $(window).load(function(){
            $(".slidebox").mSlidebox();
        });
    })(jQuery);
</script>
That’s pretty much all the basics you need to do in order to use the plugin.
Final result example
<!DOCTYPE HTML>
<html>
    <head>
        <link rel="stylesheet" href="jquery.mSimpleSlidebox.css">
    </head>
    <body>
        <div class="slidebox">
            <ul>
                <li>
                    <div>slide 1 content</div>
                </li>
                <li>
                    <div>slide 2 content</div>
                </li>
                <li>
                    <div>slide 3 content</div>
                </li>
                <li>
                    <div>slide 4 content</div>
                </li>
            </ul>
        </div>
        <script src="http://ajax.googleapis.com/ajax/libs/jquery/1.6/jquery.min.js"></script>
        <script src="http://ajax.googleapis.com/ajax/libs/jqueryui/1.8/jquery-ui.min.js"></script>
        <script src="jquery.mSimpleSlidebox.js"></script>
        <script>
            (function($){
                $(document).ready(function(){
                    $(".slidebox").mSlidebox();
                });
            })(jQuery);
        </script>
    </body>
</html>
Configuration
mSlidebox function can get the following option parameters in order to customize its behavior and basic functionality:
autoPlayTime: Integer |
The time of auto-playing next slide, value in milliseconds |
animSpeed: Integer |
Slide transition/animation speed, value in milliseconds |
easeType: String |
Slide transition/animation easing type, see jquery UI easing for all available easing types |
buttonsPosition: String thumbsPosition: String |
Position of slidebox next/previous buttons and slides thumbnails, values: "inside", "outside". Example: controlsPosition:{
buttonsPosition: "inside",
thumbsPosition: "outside"
} |
pauseOnHover: Boolean |
Pausing auto-slideshow when cursor is over slidebox area, values: true, false |
numberedThumbnails: Boolean |
Display numbers inside slides thumbnails, values: true, false |
An example of defining these options parameters and their default values is as follows
$(".slidebox").mSlidebox({
    autoPlayTime:7000,
    animSpeed:1000,
    easeType:"easeInOutQuint",
    controlsPosition:{
        buttonsPosition:"inside",
        thumbsPosition:"inside"
    },
    pauseOnHover:true,
    numberedThumbnails:false
});
Style & Design your Slidebox
You can style your slidebox(es) using the jquery.mSimpleSlidebox.css file which contains a basic style for any slidebox with class name .slidebox. I suggest keeping this basic/minimum styling and doing your custom styling over an additional class name, id etc. For example, you could give an additional class (e.g. myClass) to your slidebox:
<div class="slidebox myClass">
    ...
</div>
Then, in your stylesheet you could define all your custom styling using .myClass. This way your slidebox has all the basic styling (via .slidebox) and all your custom design via your class name (.myClass).
You can also have a separate styling and design for each of your slideboxes on the same page, either by giving them different class names or ids or simply by targeting them in your css like this:
.slideboxContainer_1 ul li{
    /* 1st slidebox slides style... */
}
.slideboxContainer_2 ul li{
    /* 2nd slidebox slides style... */
}
.slideboxContainer_3 ul li{
    /* 3rd slidebox slides style... */
}
…and so on. Each slidebox in your document is automatically wrapped in a div with class its index number, in the form of slideboxContainer_+index number (e.g. slideboxContainer_1). This way you can easily use those classes to style each slidebox.
The same goes for styling differently each slide of any slidebox:
.slideboxContainer_1 ul .slideboxSlide_1{
    /* 1st slidebox 1st slide style... */
}
.slideboxContainer_1 ul .slideboxSlide_2{
    /* 1st slidebox 2nd slide style... */
}
.slideboxContainer_1 ul .slideboxSlide_3{
    /* 1st slidebox 3rd slide style... */
}
…and so on. Each slide also gets automatically an additional class with its index number. So for example, if you have 3 slideboxes on your document and you wanna style the 4th slide of the 2nd slidebox, you can easily do it by:
.slideboxContainer_2 ul .slideboxSlide_4{
    /* ... */
}
In general, you can style your slideboxes and everything in them in many ways and however you like (class names, nth selectors, using + or ~ etc.). You can really go berserk on styling and do some pretty complex stuff 😉 The download archive contains the styling I’ve done for the demo so you could use that and build on it.
For your convenience, I’m providing the final markup of a slidebox after it’s being processed by the script, so you can see the result and have a “blueprint” for styling:
<div class="slideboxContainer slideboxContainer_1">
    <div class="slidebox">
        <ul class="slideboxSlides">
            <li rel="1" class="slideboxSlide slideboxSlide_1">
                <div class="slideboxCaption"> ... </div>
            </li>
            <li rel="2" class="slideboxSlide slideboxSlide_2">
                <div class="slideboxCaption"> ... </div>
            </li>
            <li rel="3" class="slideboxSlide slideboxSlide_3">
                <div class="slideboxCaption"> ... </div>
            </li>
        </ul>
        <a href="#" class="slideboxPrevious"/>
        <a href="#" class="slideboxNext"/>
        <div class="slideboxThumbs">
            <a href="#" class="slideboxThumb selectedSlideboxThumb" rel="1"/>
            <a href="#" class="slideboxThumb" rel="2"/>
            <a href="#" class="slideboxThumb" rel="3"/>
        </div>
    </div>
</div>
Changelog
- Mar 14, 2012
- The original slidebox script has been greatly enhanced and optimized, as well as converted to a proper jquery plugin for easy implementation and customization
License
This work is released under the MIT License.
You are free to use, study, improve and modify it wherever and however you like.
https://opensource.org/licenses/MIT
Donating helps greatly in developing and updating free software and running this blog 🙂
I just wanted to say thanks for sharing. This is great.
You can place your images (or any html you like) inside .content div. There’s no images auto-implementation on the script, so you can simply enter something like:
<img src="your-image.jpg" />inside .content div, or maybe:
<div style="background:url(your-image.jpg);">
    your html content
</div>
to set the image as background and show content on top of it.
This is a very simple and plain script, providing just the slider mechanism. I’ll create a much more advanced in the future 🙂
Hi.
very nice and SIMPLE! But, in what folder(?) I should keep images? (they are not showing up!)
D.
when it gets to the last slide, it scrolls backward through all the slides to get to the first again. How do we get it to just scroll to the right to the next slide instead of going backward through them all? It’s very annoying and unprofessional. Thanks.
Hello. It is very simple and clean which i was searching for.
i want to say thank you for this slidebox jquery banner rotator. and its good that we can add some description..
regards.
Hi,
I combined this script with JCarosel lite.
You can download the script at:
http://www.scriptbreaker.com/javascript/script/JCarosellite-with-pagination
Enjoy
Now with the correct link:
http://www.scriptbreaker.com/javascript/script/Jcarousellite-with-pagination
Hello friend,
Is possible insert a hyperlink on the banner images?
Greetings
I’ve already solved.
I updated the version of jQuery (mi.js file) “jquery-1.5.2.js” downloaded from the official website of jQuery.
Greetings
Hi Malihue,
I have problems when there are many layers of content (div-content).
The buttons “Next” and “Previous” will not work right from the content 19.
Up to the 18 works fine, but when you click “Next” Step 2 content.
Can you help?
Thank you very much
Hola malihu,
Tengo problemas cuando hay muchas capas de contenido (div-content).
Los botonos “Next” y “Previous” no funcionan bien a partir del contenido 19.
Hasta el contenido 18 funciona bien, pero al pulsar “Next” paso al contenido 2.
Puedes ayudarme?
Muchas gracias
I’m having a problem where in between every slide I get a ‘blank’ black one. How can i get them to go straight from one to another?
Send me a link with your implementation, to see if I can help.
Beautiful work! Is there any way by which slider moves bottom to top instead of right to left? eg. http://builtbybuffalo.com/
nice slider, how can it be configurated autoplay all the time instead an user push prev or next buttom?
thx in avance.
Edit line 37 removing ‘stop’ parameter:
Slidebox('next');Edit line 40 removing ‘stop’ parameter:
Slidebox('previous');Remove or comment line 87:
//clearInterval(autoPlayTimer);I would suggest against the practice of constantly auto-playing, as it may have a negative impact on user experience. A user clicking a slide, means that he wants to see/read that particular content and we should not change the content he selected by auto-sliding another one.
very good malihu
already implemented this change?
thanks
Hi Malihu,
Just wanted to say thanks for the great script. Thanks for keeping it simple and slimmed down, it makes it easy for people to style!
Awesome script!
Is there a way to have the thumbs number boxes change colors when it is going through the images? For example, when it goes to the second image, the “2” thumbs box changes to white and so forth… Thanks!
I’m trying to find some time to implement it Ray. I’ll post an update here when it’s done 🙂
Done 😉
Check the demo and re-download the archive.
Works beautifully, thanks again!
Hello! Thanks for sharing. It is awesome.
I am just wonder if there is another effect for rotating images other than slideshow? I am after the effect of “fading out”.
Thanks a lot!
Very nice effort
Hi, thanks for this code – its efficient and smooth!
im having trouble figuring out how to add/delete the pages – to make it not be 4.
let me know where to start
thanks –
…. nvm/// 0_o…
Nevermind! After further review of the slidebox my question didnt make sense.. thanks!
Is there a way to reverse the slide? I need right to left. I’ll keep playing around with it but not sure where to begin. Thanks!
Just two quick questions for you. First, after clicking the arrows the autoplay is disabled—is there anyway to have the timer reset after clicking to the next slide? Second, how tough would it be to have an active state for the thumbs?
This is my first time checking out your work and it’s great stuff, thanks a ton for sharing.
Hello Jeremy,
Thanks for your suggestions. I plan to upgrade the script and make it a plugin (within the next weeks) so among others, I’ll implement the features you said. The continuous autoplay after you’ve selected a slide (by clicking the arrows or the thumbs) is not so great usability-wise, so I’ll probably implement it as an option (on/off).
Thank you for your comments 🙂
Well that was weird since I did nothing myself but suddenly it just worked fine. I will get the must recent code and put it in my script to make sure everyone can experience this great plugin at my site.
Thanks for showing great commitment. It is certainly appreciated.
Keep up the good work and make em great plugins coming our way 😉
Oh, hold on! I’ve just checked the Demo and it works fine now?
Have you made some changes since last time, or perhaps a (almost) christmas miracle has appeared? 🙂
Yes, only IE 8.0.7600 seems to have that issue. I haven’t changed anything Martin. Anything changed on your side? I’ll check it further.
At last! I managed to check it on IE 8.0.7600 and fixed it. Seems that this version of IE had issues with position().left and offset.left and didn’t get the element position correctly. I changed it to .css(“left”) and everything worked as it should 🙂
Sorry to tell but it still goes blank after the fourth content. I remember I came by a week or two ago and saw this plugin and added it to my bookmarks, and there were no problems at all and I felt in love with the simplicity of the code and the function I was been looking for – and back then it worked out fine, no problems after the last box.
But then I returned yesterday as I wanted to use it for a project, and after my integration of the code I got this error, thought I caused the error by modifying the code, but then I saw your demo and it had the same reaction.
I would love to help you fix the issue, but I’m a PHP coder and my jQuery expertise so far is to use pre-made plugins only and mod them if necessary.
Hope you conquer this issue as it’s a great plugin indeed.
Thanks for the input Martin,
The thing is that I have IE 8.6001 (mistype – I meant 8.0.6001) and the script is working fine so I cannot check it (working “blind”). I think that some IE patch interferes with the script (that’s the reason it worked for you before and now it doesn’t). Please let me know your IE version and OS. It’s weird cause the script works fine even in IE7 but a specific sub-version of ie8 has this issue.
I understand you, I have the same problem when working on slicing XHTML and CSS and my customer has Safari/Firefox on MAC and I’m working on PC. So I have to go to my friends office to check it on MAC as working blind is a b*tch, so I feel you.
My version of IE is: 8.0.7600
My OS: Windows 7 Ultimate 64-bit.
Since my version is older you might use some methods or something that doesn’t is integrated in my version, I don’t know? I’m not that into building JS plugins so I don’t know. Even the “continous” sliding is still a mystery for me so you can guess my low JS level 🙂
I don’t want to be a headache, but isn’t there a way to avoid issues in any version of IE 7+? Is there certain methods that can be replaced by others? I’m asking since I am not familiar with the methods and the source so my question might sound foolish, but perhaps there could be some replacements. As in PHP there are some methods that are “outdated” and by twisting others you can get the same result, might need some more (sometimes less) code, but it will fix the issue.
I’m using IE8 and after the content 4 box it just continues into blank, is that the point? I thought it would go back to 1 but it doesn’t, is there gonna be a fix for this one?
Just saw now that Alec who before me had the same problem, but I see no fix working. But it’s been like a month since your comment about the fix, so I would just hear if you have fixed it yet. Would love this with the fix 🙂
With that said, nice job! Keep it up!
Hi,
Please check the demo again and let me know.
Hey,
I love this. Thank you for making it.
But I am having a problem with Internet Explorer 8. The same problem as an earlier commenter; the rotator refuses to loop and instead ends at a white page.
Do you have a solution for this by chance?
Thanks,
Alec.
I’ll check the code again Alec and let you know. Thanks
Problem solved.
Hi,
Thanks for sharing the nice script.
Just want to know how can we display different images instead of background color. I tried but it didn’t work. Please let me know how to do this.
Thanks in advance
Praveen
Simply replace “content 1”, “content 2” etc. with the images you want (on the demo the images should be 544×270 pixels). Alternative you may need to insert the images as backgrounds of the divs with class name “content”.
I’ll update the demo and post with full markup and usage guide as soon as possible.
You should be able to make an image as the background with CSS.
#slidebox .content{background:url(/background.png) no-repeat left top;}If that didn’t work, you can insert the image normally but with absolute position.
Hope that helps!
Hi,
Ive copied the slider over to where i want to use it but just doesnt function?
ive moved the scripts, etc, made a new folder with the js file in that, linked it all up. But doesnt function?
Can u help please! 🙂
I can’t really help unless I see the code of yours…
Make sure you have the correct path to both jquery and jquery.easing files.
Hi,
Ive manages to get it to work, thanks allot 🙂
just another question,
what if i wanted to use it twice on 1 page? ive tested it, but it moves the 1st section too.
ive got 2, on top of ech other, but when i click on the 2nd box, it moves the top section box too, so they both aminate, how would i stop that?
thanks 🙂
In order to have 2 slidebox instances you’d have to rename the 2nd one to e.g. “slidebox2” by copying and renaming all css and javascript code references.
Right now the script looks for div id “slidebox” when animating, so it animates every div with an id of “slidebox”.
It could be tricky tho cause I didn’t really make this script to work with many instances.
I’m having problems getting it to loop consistantly in IE8. It’s basically proceeding to a new slide that’s blank. Firefox is fine. I did add an additional slide – do you have any ideas what I could be missing?
Actually it’s happening on your demo as well.
Hello Ryan
It works fine for me on IE8 (version 8.0.6001). What version you’re running?
The same version – strange.
I actually checked with a few friends as well, some have the problem some don’t. Maybe it has something to do with an IE8 setting somewhere?
Gotta love IE 😛
I have no idea what could be the problem but I’ll check it further and I’ll let you know.
Edit: problem solved
I like this one, too. And it is easy to design 🙂
Thank you for sharing this 🙂
Thanks! I’m trying not to design much or make complex css for these so to be easily customized 🙂